

Three months in: Woo hoo! Every week amazing progress happens (we've been told by folks to not get too used to that as things slow down once work focuses on the interior...).
The big news this week is that the windows arrived! And they look mighty fine. Although aluminum windows from the old days have a bad rep, these are pretty sweet with a thermal break, an Energy Star rating, and nice lines outside as well as inside. And they're recyclable! But hopefully they won't be recycled anytime soon...


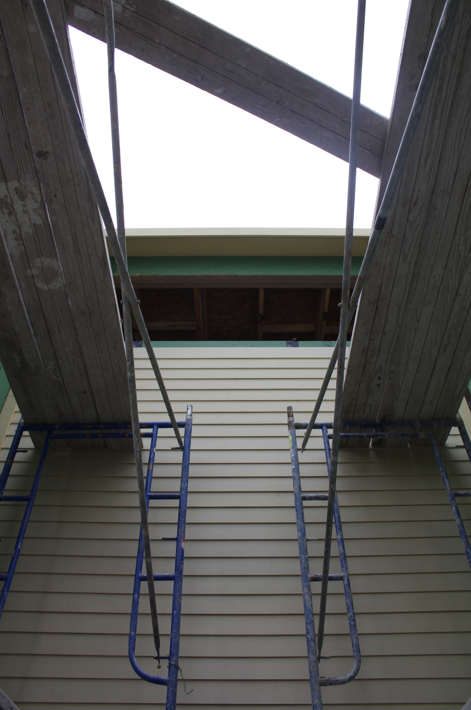
In the photo above, you can see the the Hardie board installed on the house where Hardie board is supposed to be installed (stucco will be everywhere else). Also note the black lines on the green panels. The green panels are part of the Zip System, sheathing with built-in moisture barrier on the outside and special tape (that black stuff) to seal the seams.


The garage is fully clad and has its windows installed (we chuckled that the garage windows are double paned...).

And there be Hardie on the south side of the house as well:
The sewer line and water lines are hooked up and waiting for city approval:


as is the lowered ceiling above the dining area (done to allow ductwork to jump into the living room):

issues resolved, issues pending, new issues...
We now have the missing window in the kitchen:

The bride is already in love with it. Lets in a little light from the side.
Window X, the window above the powder pooper, is turning out to be a, well, pooper. Unfortunately, it didn't get ordered (the architect uses Window X for window planning purposes [kinda like Planet X: does it exist or not?]; however, it turns out we reach X number of windows in the alphabet, so we really have a Window X). The window only costs about $200 to make, but the one-time fees and shipping add an extra $400 to the cost, and it takes six weeks to get built and on-site). The window is spec'd to open, but we figure that doesn't really make sense with a bathroom window that opens up onto what amounts to the front porch area (Tinkle, Tinkle, Little Star?). Perhaps the architects wanted an opening window because of the thickness of the aluminum on the outside (see second photo in this post). Regardless, we told the builder that we're fine with a (non-opening) storefront window for that location, something that can be gotten locally relatively quickly.

The roofing detail at the end of the carport has not yet been resolved:

Watching this closely since the roof is apparently going on this week. This needs to get fixed cause it looks like ass.
Someone showed up today to start installing weep screed (the metal stuff at the bottom of the outside walls to facilitate drainage from the wall to the exterior):

and moisture barrier (that black stuff on the lower part of the house):


and herein lies an issue: That don't look right to me. The idea here is that you put two layers of moisture "barrier" up because the top layer is sacrificial (I put barrier in quotes because it's not an absolute barrier; you really don't want an absolute to allow the wall to breathe so it can dry to the outside or to the inside). The stucco bonds to the top layer and compromises the hydrophilic (water repelling) properties of the barrier. As the stucco dries, it retracts a wee bit and creates a drainage plane between the first layer of moisture barrier and the second, thus creating a drainage plane. Ideally one would use a proper drainage plane here (a thin layer of drainable puffy stuff), but a number of folks (including the builder's stucco expert) say using two layers of moisture barrier works (and the Zip System actually constitutes another layer).
All of this is fine, but what I don't like is how the layers are layered. I think that stuff should be layered like this:

with each layer independently shingled upon itself rather than the way it is now (the black lines are the layers of moisture barrier and the orange is the stucco):

which creates truncated drainage planes (not good) and thus, no drainage. This risks compromising both layers. Sure, the Zip underneath is a last chance to move that moisture away from the wall, but then why have two layers in the first place? I ain't no stucco expert, but that sure don't look right. Hopefully this is just a case of a Sunday working not really knowing what he was doing...
coming up:
They still need to install the big ole window in the living room:


We'll also be meeting with the architect, builder, and HVAC sub on Tuesday to discuss duct runs. The architect is calling for 10-inch holes to be cut into the beams, something that's making the builder nervous even though the engineer has signed off on it. Truth be told, it makes us a little nervous too. I suspect that there are several of these cutting-holes issues about the house. Should be an interesting meeting. We're especially looking forward to the architect being there: This will be our first site visit where he's there as well!
moment of bliss:
The dumpster is gone, so now we can get a full shot of the double cantilever. Everybody say "aaahhhhh...."

Looking good! Any leftover siding I can steal? I'll try to drop by to see for myself tomorrow.
ReplyDeleteRe: the drainage plane: I think your drawings are backward -- you have the second drawn as shirt and sweater tucked into pants and underwear; as it's currently installed, they're actually both untucked. But I agree that they should be layered -- the problem I see is that if the stucco sticks to the outer layer, it'll effectively glue the sweater layer to the pants layer so moisture will travel down between the sweater and the shirt and get trapped there, instead of continuing down to the space between the pants and underwear. (Not to get all personal.)
Weep screed -- important. Stucco is tricky stuff.
aaahhhh.... I shoulda explained those drawings. The orange is meant to show the stucco bonded to the outer layer. Added some words above to clarify. The shirt and sweater is untucked.
DeleteI had no idea what weep screed was until today.
Oh, gotcha. Is the stucco going to be orange?
DeleteBurnt.
DeleteLooking great. I'll gladly trade you guys your lovely new windows for some single-pane, terrible, I-can-literally-feel-the-outside-air 1950s windows. Heck of a sales pitch, I tell ya.
ReplyDeleteBeen there done that on the single panes with our previous house...
Delete