1.28.2022

cloudhaus: framing 3


Progress on the cabin has been craycray! Things are moving FAST. Let's take a quick tour!

The photo above is looking up toward part of the forest-facing back with the bedroom on the near right, the kitchen (behind that single window), the dining room (behind the four windows), and the living room on the left.

A shot of the HVAC going in. That dark space behind the unit is, interestingly, not in the plans. There should have been a concrete block wall there and then that part of the house on piers. I speculate that when they got out there, they saw that they had underestimated the slope of the hill, so pushed the wall out since they were going to have to go down that far anyway. Interesting that it is still open. Cool that we will have a bunch of additional indoors storage space.


Yep, we included AC even though the vast majority of places in Cloudcroft don't have it. We put it in for several reasons: (1) we were going to have central heat anyway, so why not include AC for a few thousand more, (2) it doesn't happen often, but Cloudcroft does get the occasional unseasonably warm day (or week), (3) it's only going to get warmer (see the temp trend bar below for Cloudcroft) and all the freakin' CO2 we're pumping into the atmosphere, and (4) when our Austin friends were high-tailing it to Cloudcroft to get out of dodge during the pandemic, every last one of them were completely freaked out by the lack of AC, so we think having it (even though the odds, at this point, of needing it are slim) will be a selling point when we VRBO this sucka. 


This is a view of the basement bedroom with a peek of the stairway to the right: 


This is looking toward the dining room/kitchen: 


This looking toward the southeast corner of the living room:


Looking toward the back wall of the kitchen. On the other side of that wall is a hallway and the owners' bath. Gotta laugh at the chewy box! Also, I see the pocket door packing. We spec'd a poo-ton of pocket doors in the cabin, a lesson we learned from building our current house. WE LOVE THEM!

 
Laundry room with the master bath behind 


It's funny what the builder thinks is interesting versus what we think is interesting (although I appreciate all the photos he sends). I think I'd be more focused on the views out the windows rather than the infrastructure, but these photos are also used to support draw requests.


 In the owners' bathroom, owners' closet behind there, and then the owners' bedroom. You can get a hint of the views out the bedroom windows!


Another view of the roof trusses in the living room looking toward the dining room and kitchen. Wasn't expecting the trusses here to be running this direction given that there is a HUGE roof over hang to the right. 

 
Two-sided gas fireplace. Feeling a little guilty about having this (but not guilty enough to not do it). A fireplace is part of the charm of living in the hills, methinks. Will probably carbon offset the gas we use.


This is looking toward the street-side of the house. It's a very introverted design with a monolithic face toward the street (although there will be two windows on the right). I have always adored those highly introverted Japanese designs, so we have a little of that going on here. That entry will be a little smaller than shown. 


Full shot of the kitchen. Was having some worries about ceiling heights, but this looks great.


Trusses!!!


Hallway trusses and a big ole beam!


View from the living room back to the dining room, kitchen, hallway, and entry.


Nice shot of the slant on at the front facade. Cool feature. The builder reported that the neighbor comes down every day to check out the progress and that the framers heard him exclaim to himself "What in the world!?!!?!!" when he saw this wall going in. 


A broader view of the southern side of the cabin. I think I see now what is going on structurally here: there's a "supertruss" extending all the way out to the edge of the overhang and then "minitrusses" perpendicular to fill in.  

 
And there you have it! Making plans to get out there soon to see it all in person (and with a wide-angle lens). Trying not to go until the floor to the porch is done so we can get a full sense of what experience will be living there. It's really exciting to see it become a reality! 


1.23.2022

cloudhaus: kitchen thoughts


I feared this day would come: the builder said a couple weeks ago that we need to decide soon on the kitchen cabinets. However, it's not that simple since decisions on the cabinets mean decisions on finishes, features, fixtures, and appliances. 

Yikes! Especially since we are not too sure yet.

Perhaps the best way to start is with the "deal-breakers" or things we know we know:

- We want engineered quartz for the counters.
- We don't want a microwave perched over the range/cooktop.
- We prefer a cooktop.
- We want a counter-depth fridge.
- We want an undermount sink.
- We want a built-in microwave (or microwave "slot").

Beyond that, it is all open season.

The builder stayed with us couple years ago for an event in town, which also allowed him to see what we have in our Austin home. So he's proposed that we do that or use Hickory (which he knows that I love). Doing what we have now in our house would be the easy path, but that's just boring.

 So here are the plans for the kitchen in the plans:


 Material-wise, we have this slate for the floor:


I'm not sure what the ceiling will look like (I think the architect and builder are perplexed when I reply, in response to their inquiries on cabinets "What will the ceiling look like?"). If it's white, fine. But if it wood, then that's a different ballgame. We've gone back and forth so much on the ceiling that I'm not sure where we wound up. [update: we're talking standard white with a smooth stucco outside).

Around the corner, in the hall, will be a shou-sugi ban wall:

So here is another material/color choice, perhaps pulling something like this (or something black) into the kitchen. It certainly seems to complement the slate. 

Chrome and silver work with everything, and they certainly would work here. We've settled on Moen's Align line for faucets and whatnot for the cabin:

For engineered quartz countertops, we're thinking of what we have now:

or, at the very least, something that leans white. Although I despise stuff that tries to look like other stuff, I kinda like the "marbling" you can get with engineered quartz:

It also seems like there needs to be some natural wood to soften things up a bit, so perhaps some hickory shelves for accents, something hickory to set on the counter, and then hickory chairs in the dining area.

Here is an example of what maybe we could go for:


 ...and, in fact, this is what we're going to go for! One hope of putting together this post was to clarify our thinking.

Been using the website www.kitchenplanner.net to plan the kitchen (and the site is, disturbingly, down at the moment...) and came up with this:


which I think looks sharp. This would be the material palette for the kitchen:


cloudhaus: gutter talk...


One of the outstanding issues has been what to do with the gutters. If we didn't have rainwater harvesting, we wouldn't have gutters to the let the point "sing" full throated. But we have rainwater harvesting, and the roof tilts toward the point, so there must be gutters. My initial thought was to "hide" them in the roof before the edge. However, although possible, that's generally not a good idea since leakage would rot out the roof at some point. It's further complicated in a cold climate where ice dams can be an issue (the builder was talking about heating the gutter to prevent ice dams on an "internal" drainage system.

I was fortunate to find photos of an existing house that has a somewhat similar roof design. It turns out that an outside gutter can look OK in this geometric setting. Given that our point isn't as pointy as my mind had made it out to be, an outside gutter will be fine. Similar to our cabin, this house uses gutters to funnel rainwater into tanks. 

We'll still be running the drainpipe in through the structure, albeit in the non-conditioned "shed" at the front of the floorplan and then down into the basement. The first flush system, where the first water to come off the roof is flushed out before rainwater is directed into the tank, will also be inside the unconditioned structure of the house, which is cool. Similar to our current house, we'll use Gutter Glove to filter the runoff before it enters the gutters.


a split decision: minisplit for our bedroom


We had such high hopes... After going through Austin's Green Building training, we were hell-bent on having an uber-efficient HVAC system from the ducts to the mechanics. We had the design--the architects spec'd a centrally-located system with main trunk lines that would facilitate easy airflow to all parts of the house. And then the engineering happened.

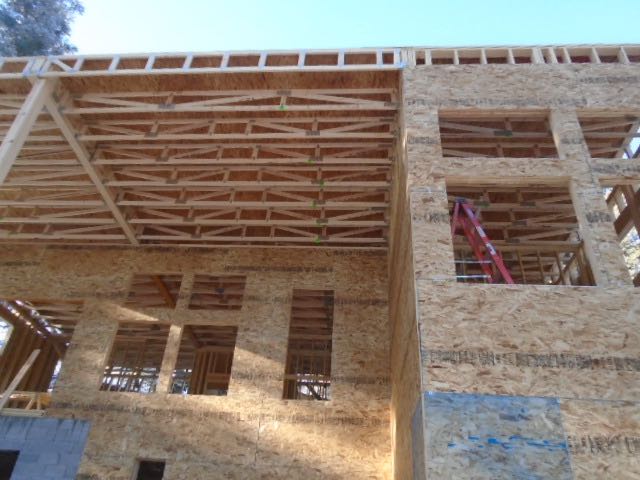
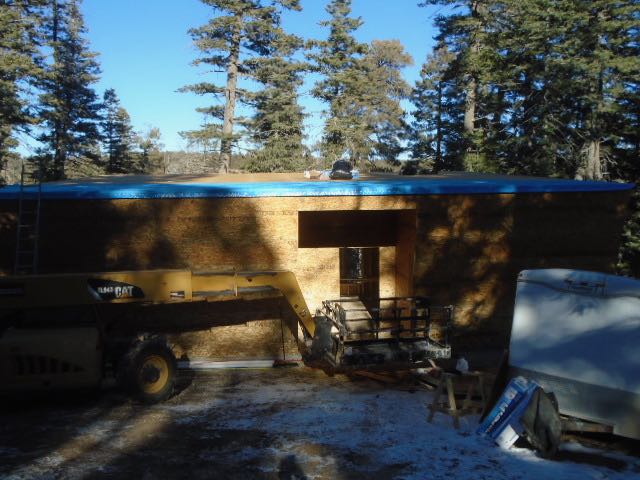
We needed an engineer because of the cantilevered carport, so he appropriately spec'd several massive glu-lam beams to support the carport and the window wall in the living room. Being an engineer, he was appropriately efficient, and since he had leftover glu-lam, he instructed the framer to use it to support the hallway to the owners' suite. 

Oops. 

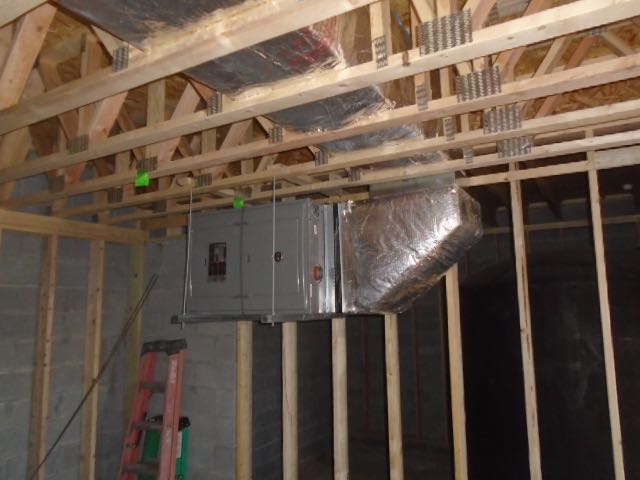
No one noticed this until the HVAC guy showed up and said (paraphrased) "There ain't gonna be no duct work heading down that hallway." As a consequence, the ductwork for the owners' suite was small and convoluted, snaking into the attic space above the the second floor, down through the guest room closet, over and across the owner's bathroom and, finally, into the owners' bedroom. The restricted area of the duct, the ribbed sides of the duct work, and the various angles the ducts suffered greatly restricted airflow. In fact, we even blew out the duct work at one point because it couldn't take the flow. To even tell if air was coming out in the bedroom, I had to tape a piece of soft plastic to the duct. 

Ironically, one of the primary things we were looking forward to was having a bedroom that matched the temperature of the house. In our previous house, the master was similarly an isthmus at the edge of the conditioned zone and was always colder than the rest of the house in the winter and warmer in the summer. When we first moved in, the house had one gas heater two rooms away. On cold nights, we would get into bed, exhale, and watch our breath hang in the air. We upgraded to central air and heat, which greatly improved things, although un-insulated walls and large single-pane windows still left the room too warm in the summer and too cold in the winter.

And here we were again. 

Solution? Minisplit! Minisplits are basically fancy window units that don't (generally) go into windows. The condenser/compressor heat pump sits outside and is variable speed, so they are energy efficient. The air handler sits inside, usually attached to a wall. The two are connected together through a power wire, a control wire, and two refrigerant pipes.

Aesthetically, I have a problem with them. They are butt ugly. Some manufacturers have tried to hide them behind paintings, but then it just looks like a painting with a robot behind it. Ideally, you can sink one into the ceiling, but you have to have clearance and, it seems, attic access. So wall wart is the way we went.

Mini-splits can be loud. We recently stayed at a rammed earth solar home in Mesilla, New Mexico, and the house was conditioned with ductless splits. The no-name unit in our bedroom sounded like the Red Barron swooping in for the kill. The Bride researched units and concluded that Mitsubishi was the only choice. Conveniently, an installer for Austin lives a couple blocks down our street (and gets rave reviews on nextdoor), so we commissioned his company (Faught) to install the unit. After exploring different options for locations, we decided to put it right above the bed. This location was handy because the electric box is right there with extra breaker space for installation.

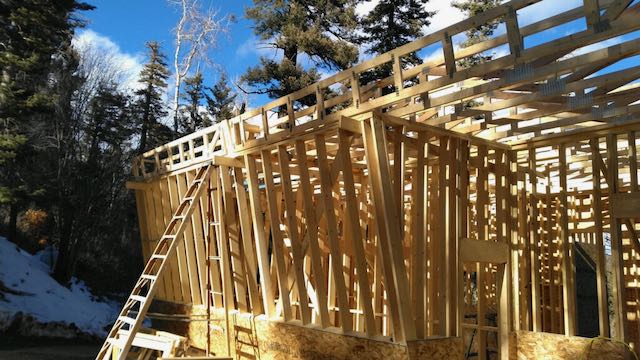
Installation only requires about a 3 to 4 inch hole from the inside to the outside (I didn't see what sized hole they drilled for us). It turned out to be handy to have photos from framing the house to verify that the center above the window did not have framing. That also meant that the unit could be centered (something that would have driven me crazy if it wasn't).

The unit is amazingly quiet, although it can be loud if you want it to be (say to get a quick warm-up or cool-down). In whisper mode, which we can use to maintain temperature, is practically silent (although the cats know that it's doing its thing). 

We really need the split for the summers, so we won't really feel its benefits until then. In the past, we've had to put the temp down for the whole house to icebox levels to get something just OK in our bedroom. We won't have to do that anymore, so I'm guessing that, in all, it will save us in energy use (although I don't know what its phantom power draw is...). 

Why now? (1) The Bride had had enough and, with a bonus in her hand, moved on this, (2) reluctance due to the aesthetics (which are not great, indoor or out) but livable, (3) as we approach retirement age (<10 years), we need to take care of things before the big day, and (4) time flies, man: you blink, and eight freakin' years go by!


1.15.2022

cabin: framing two


Framing always goes fast, and it has been no different at the cabin. Similar to our house, rooms look too small in framing (but will look enormous once the frames are sheathed. Nonetheless, we can start seeing what the views out of he windows look like. And, holy cow: look at the windows in the primary bedroom see above)! 

starting to come together...

view out from the living onto what will be the porch

looking from the living back toward the kitchen

hallway entry towards the primary bedroom

down the stairs!

all the way down!
 
front door!

front left of the house. can see the angle on the front.

a visitor!

"Just passing through..."