

Ah, yes: like any Texan worth their weight in Cooper's brisket, I love the smell of BBQ smoke in the morning! After watching BBQ Pitmasters, this hobbyist smoker learned that controlling temperature over long periods of time is key.
Season 1 of Pitmasters featured Harry Soo of Slap Yo Daddy BBQ who used Weber smokers and computer controlled fans to control his temps. Pretty dang cool! While hanging out with a cousin-in-law from Houston a few weeks ago, he turned me on to Flame Boss 200, a wifi-based computer controlled fan for Green Eggs. He regaled our taco table with stories of adjusting his temp while at his sprog's baseball game. Pretty dang cooler! And then, to top it all off, Santa brought me one for Christmas. Pretty dang coolest!
But there's one problem: Flame Boss equipment doesn't work with most Vision grills, the grill that we own (see photo above). Pretty dang anticlimatic.
But wait! I figured out how to hack the kit to work with my grill. My story is below.
Herein lies the problem. My Vision includes the (ahem) ProZone controller bay. It consists of an opening to electric-start the coals (the "lump" is what the cool kids call it), a large dial to control air flow for grilling, and a smaller dial to control air flow for smoking. That's right: I got pro control over my flaming lumps.

closed

open
The Flame Boss 200 kit assumes your grill has the more standard sliding control for your grill, what I like to call the (ahem) AmateurZone:

The sliding air controller for your average "AmateurZone"
The Flame Boss 200 comes with three adapters for variously sized sliders:

Unfortunately, these adapters--key to connecting the fan to your grill--do not work with ProZone equipped Vision grills.

A square peg for a bunch of curvy holes...
Flame Boss has a separate kit (the 100) with a more general adapter, but even that doesn't look like it will work with the Pro Zone. Plus, I want to BBQ this weekend: I don't want to send the 200 back and wait for this damn thing that might work or might not.
After inspecting my grill and the Flame Boss for a bit, I realized that I could easily hack the Flame Boss 200 to work with my grill by only drilling one (or two) holes in one of the Flame Boss adapter plates. Here's how to do it!
Step 1: Remove the Grilling Dial from the ProZone
The Grilling Dial is the dial on the right (when facing the grill) and is the bigger of the two dials.
Open the drawer to expose the back side of the dial where you will see the dial assembly with a couple of nuts attached:

Yes, I know: I need to dump out my ashes.
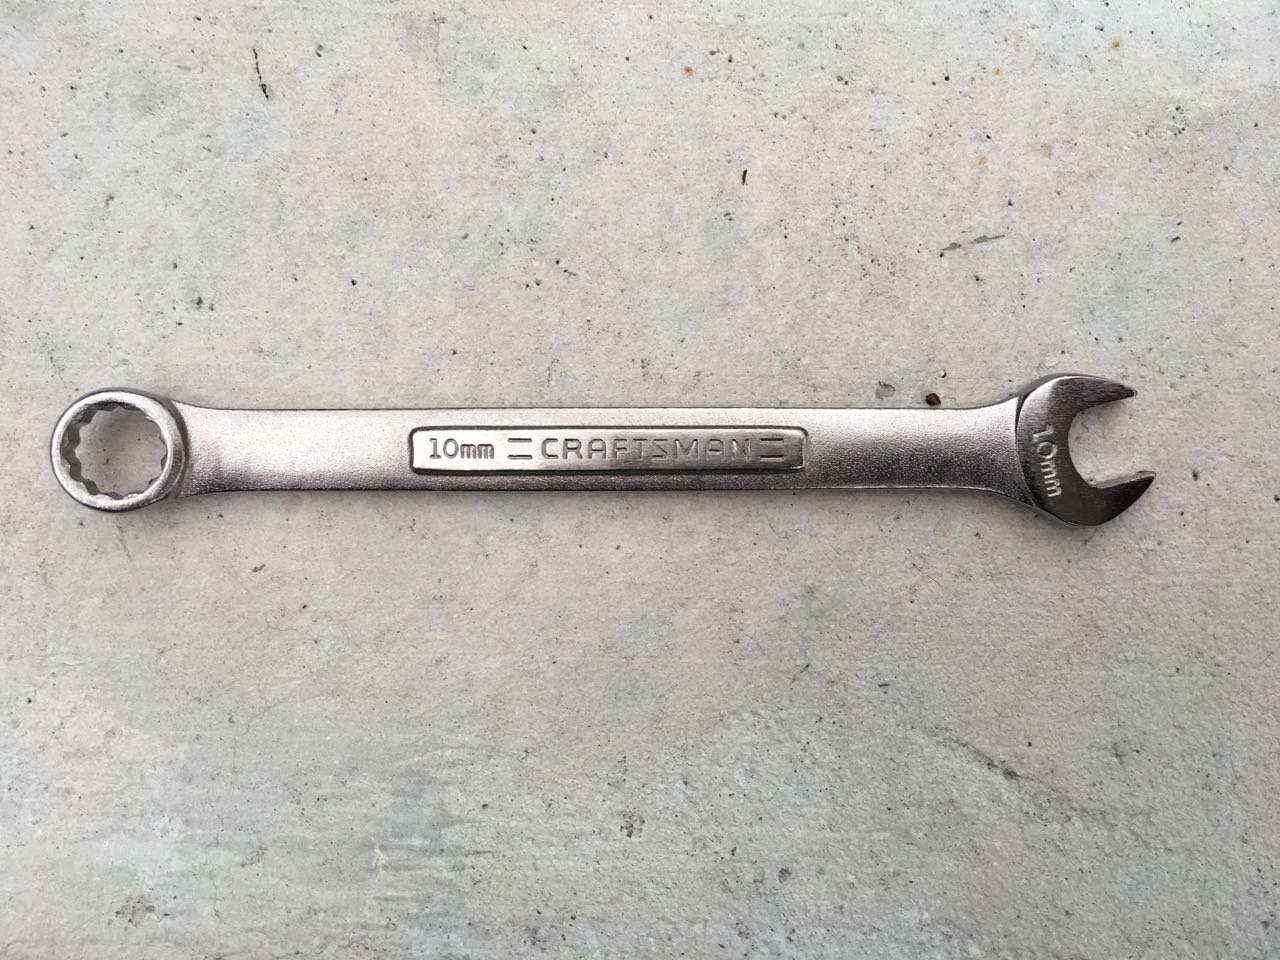
Using a 10mm wrench, remove the nuts and the associated bits. For my grill, the nuts were easy-peasy to remove.
Here's what the assembly looks like once removed:

If you forget, you always have the assmebly for the smoking dial for comparison, but it's a good idea to put the pieces back together they way they were:

Less likely to lose parts this way. When putting it all back together again, be sure to not tighten too much.
So now the back side of the ProZone should look like this:

Step 2: Remove the ProZone badge from the Pro Zone
Because of the size of the Flame Boss adapter plate, the ProZone interferes with the plate and therefore has to go. To me, this is no great loss: If you have to so prominently declare yourself a "ProZone" how actually pro is your zone?

Peering around back we can see that the badge is held on by two Phillips-head bolts.

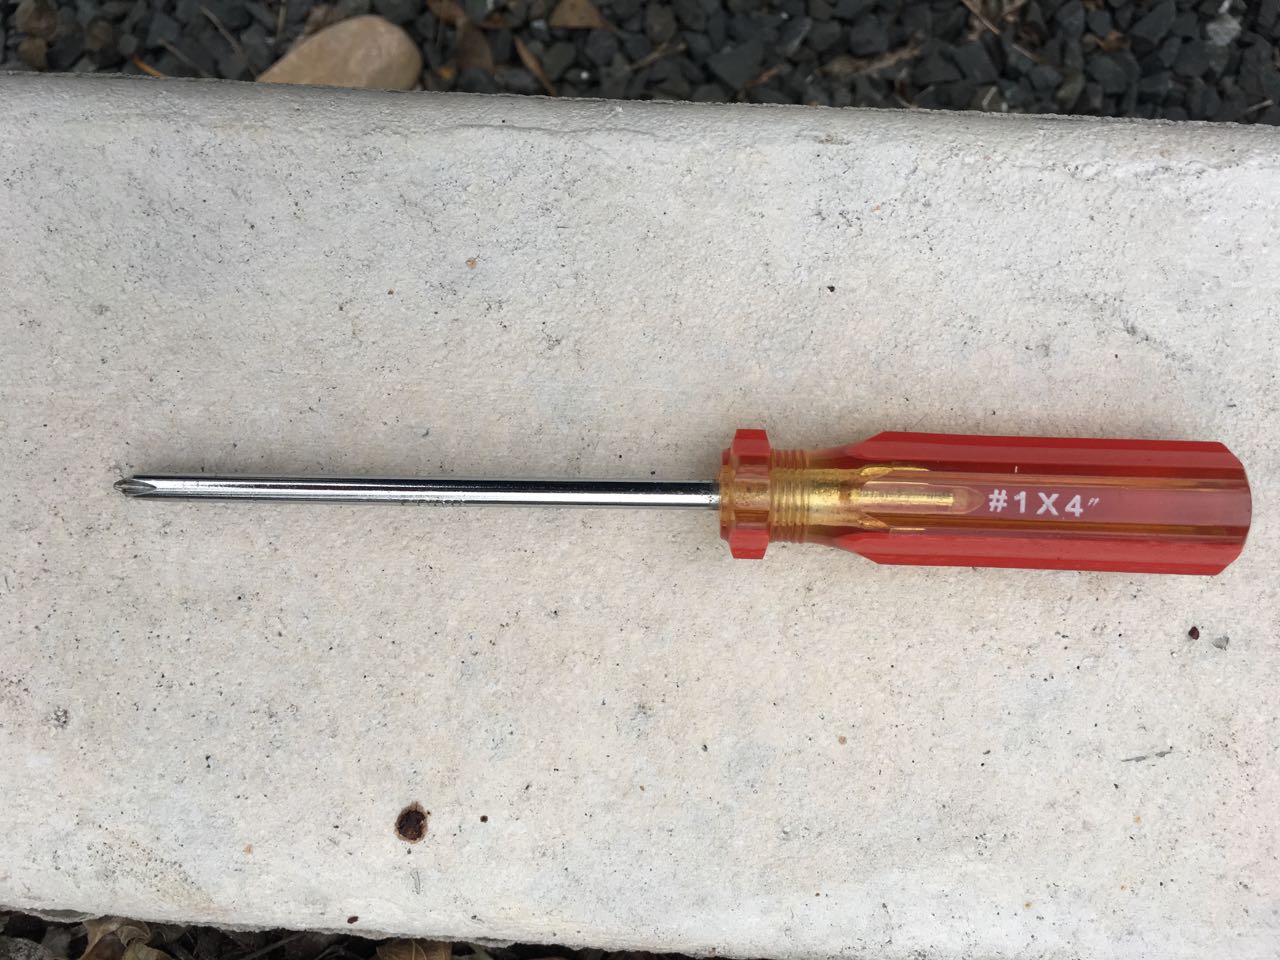
So, using a medium-sized Phillips head screwdriver, remove said bolts.
Given the tiny size of the bolts, the holes left behind are surprising large (and both feed into the draft for the fire). I didn't, but you might want to put a dummy bolt (with washer) in there to block the left hole (the right one will be covered with the adapter plate). I don't think that the holes will add too much air to the mix, but it may be enough to prevent you from shutting down the fire when you are done grilling.

An alternative to removing the ProZone badge is hacksawing a chunk out of the adapter plate to accomodate the badge.
Step 3: Drill a hole in the Flame Boss adpater plate
The Flame Boss 200 comes with three adapter plates:
You want the largest one, the one on the far right.
We're going to use the hole for the dial to attach the adapter plate to the ProZone. I first test placed the plate to see where I needed to position the plate and drill the hole.
So here's the front of the ProZone:

And here's how I want to position the plate to maximize exposure to the airhole in the ProZone:

(Note that in the above photo I had just figured out that I needed to remove the ProZone badge, so it is not removed yet!)
Conveniently, the bottom of the square cutout lines up with the bottom of the airhole in the ProZone. That meant that all I had to do was measure from that location to the center of the dial hole.

It turned out that was exactly half an inch.
I then measured and marked where the hole needed to be on the adapter plate:

Then I dinged the mark with a nail to help keep the drill bit on-spot:

I then drilled the hole being careful to hold the plate firmly as I was drilling into lest the plate turn into the Spinning Blade of Death.

There's nothing magical about the hole size. I chose 3/16 inch: seemed big enough for a bolt to hold the plate but not bigger than the hole in the ProZone.

Step 4: Attach the adapter plate to the ProZone
First, you need to scare up a bolt, nut, and washer to use to attach the adapter plate:

Then you just need to bolt the plate to the ProZone using the same hole for the Grilling Dial:


And wa-la! The adapter plate is attached! You'll notice in the photo above that the plate covers one of the holes for attaching the ProZone badge. The covered hole on the right might-could be used as a second point to attach the adaptor plate. I didn't do it here, but I plan to: It'll provide more support to the plate (pulling it closer to the ProZone front) and help control air flow, especially when the air is "off". You can also see the other badge hole. Be good to block that off as well (you'll need a tiny bolt like the one used to attach the badge else the ProZone won't seat well against the body of the grill).
And now the adaptor plate is ready for the fan, which simply "hangs" off the plate via a tab at the top and side:


Here you can see why an upper bolt through the rigth badge hole might be desireable. The weight of the fan pulls the plate a wee bit away from the ProZone body).


Finally, put your spare parts in a safe place so if you want to grill with the dial later, you can easily install it back!

Step 5: Smoke 'em if you got 'em!
You are now ready to go! Good luck!


