Showing posts with label construction. Show all posts

9.21.2014

gutter guards

I kinda despise cleaning gutters (who doesn't?). It's messy and it's dangerous (six packs of Lone Star and ladders don't mix...). And given that part of our house has two stories, cleaning gutters is even more of a challenge. At first I tried those cheapie plastic inserts that (1) looked awful and (2) simply didn't work all that well (didn't fit well and dislodged with a good wind). All in all, the cheapies were a fail.

After a quick look at Consumer Reports and an in-person inspection at Zingers, we decided to get the Tesla of gutter guards by going with GutterGlove Pro:


These babies are made of aluminum with a stainless steel mesh on top. They integrate best with metal and composition roofs (that long wing there goes underneath the roofing) but our installers (Austin Gutter King) also get it to work with TPO. And they have a nice, finished look about them that complements Modern construction.

The stuff ain't cheap, but it looks good and, thus far, seems to work good. We'll still need to go up there and brush off the screens once a year (or hire someone to do it), but we feel good that these puppies will do the job and last a long long while.

The gutter for the garage with Gutterglove Pro installed. Since we don't have a proper first-flush for the rainwater harvesting system,  these gutter guards also serve as an excellent filter for roof debris. 

12.23.2013

the miracle of insulation


It's a brisk morning here in Central Texas, down to 33 degrees Fahrenheit (what qualifies as a brisk mornin' 'round here...). Peering through our window toward our neighbor's roof, this is what I see: The miracle of insulation!

This photo is beautiful for several reasons. First, notice the lighter whitish colored areas on the brown composition shingle roof. Those are varying degrees of frost (I told you it was brisk!). The large squarish area of white is over a finished-out garage, completed sometime after the house was built in the 1950s. The roof in this area was clearly insulated since heat from the house hasn't melted or partially melted the frost. The rest of the house is either not insulated at all or poorly insulated (a reflection on 1950s construction, not the neighbors, who are fine folks).

Now notice the lines running toward the top of the roof: These are the underlying rafters, the 2x4s (2x6s?) holding the roof up. The frost level above the rafters is about the same in the insulated and poorly insulated parts of the roof. In the poorly insulated part of the roof, the rafters are serving as a wee bit of insulation since they preserve some frost compared to the space between the rafters. However, in the insulated part of the roof, the rafters are the weakest link, providing a comparative thermal bridge between the batts of insulation. In some parts of the roof, the rafters giveth; in other parts, the rafters taketh.

Since our roof is white, it's hard to see the frost levels and thus the amount of thermal bridging.

What does your roof look like?

11.17.2013

the importance of contingency funds


[We have 59 draft posts in the cue that we worked on over the past year but never posted for one reason or another, and this is one of them {an important one at that}.]


Our first architect wasn't too keen on contingency funds. He thought we needed to invest those funds in the house because if we found ourselves at the end of the project with our contingency funds intact, we'd be upset. I disagreed and told him that we'd be elated if we had extra money at the end of the project. More moola for margaritas! And who wouldn't want a contingency fund? Based on what I've read, a little more than 99 times out of 100, you're going to dip into those funds (hopefully just a few toes and not a full-on belly flop).

Why have contingency funds? To be ready for the unexpected glitches and opportunities that invariably arise. If you are completely cashed out and leveraged to the gills to build your house, you could find yourself in a bad financial situation (an expensive unexpected glitch you can't pay for, such as finding King Tut's little brother's grave where your foundation is supposed to go) or not able to take advantage of an unexpected opportunity ("Look at that extra space... Let's put three toilets in the master suite!"). Oftentimes "contingency funds" and "landscaping budget" are interchangeable terms, and certainly the landscaping budget is there to dip into if absolutely needed. But if you want your house to be landscaped at the end of the project, it's good to have a different pot of gold to ladle coins out of.

It's difficult to estimate how much you need for contingency since you are planning for the unexpected. One of the builders we interviewed used a probabilistic approach for defining the contingency fund. Basically, he assigned a probability of certainty to budget categories based on experience and then added up those probabilities (extended to the associated budgets) to calculate the contingency, something we, as a scientist and engineer, loved him for. (Not-so-brief aside: When we got married, we used a probabilistic approach to invite folks to our wedding. We aimed for 100 attendees at the wedding and reception. For each person we invited, we assigned a probability [100 percent chance of attendance for mom = 1 attendee; 10 percent chance of attendance for Uncle Sammy = 0.1 attendee] and then added up the probabilistic attendees until we had 100 total folks "attending". Using that approach, we invited about 250 people and ultimately had 102 come! Geek love, baybee, geek love!).

We chose to set aside five percent of the construction budget as contingency, and thank goodness we did. We've had some minor building glitches ka-ching our budget, but nothing like the highway robbery of the change orders for the electric. Having the contingency also allowed us to upgrade or add some additional features to the house (many of which are in those electric change orders). For example, we're looking at not only wooding the ceiling and soffits in the living room area, but also for the back entry areas as well, a real nice upgrade that made a lot of sense once we saw the house go up.

There are always opportunities to upgrade, but you need to remember to pace yourself. Adding the heliport during the first week of construction may wipe out your contingency funds. Not good if you need those funds later. And if you do set up a contingency fund, it's best not to virtually spend it before the end of the build. It's a lot more painful (and emotionally traumatic) to let those funds go if you've already spent the money in your mind on a new television set. Assume that they will be gone. And if they're not, margaritas are on me!

Postnote: We set aside 5 percent of our build budget for contingency (which is a lot of money...) and also had the landscaping, rainwater harvesting, and solar budgets to fall back on, all outside the construction loan with the bank (which, in total, is even more money...). Total contingency charges amounted to 7.3 percent of the total construction budget; however, this included voluntary upgrades focused on the landscaping. If we just look at paying for the surprises that needed to be dealt with during the build, our contingency payments amounted to 4.1 percent of the total build budget. This drops to 2.6 percent if we factor in the credits we received from some of the changes we made. Friends, that ain't bad. Better attention to bidding details on the front end (by us and the builder) might have reduced that to 1.2 percent.

Bottom line: Have a contingency. It hard to know how big one should be since it will vary from project to project and builder to builder, but I'd recommend at least 5 percent.

10.20.2013

we got tanked last week...


Rainwater tanked!

Our rainwater tank got installed about a week and a half ago and our gutters got installed last Friday (at least the one for the garage that goes to the tank). Unfortunately, we missed the big rains that have passed through town the past few weeks (buh-bye 3,000 gallons of rainwater...), but we are ready for the next rains.

The first thing we had to do was clear a spot to lay down six inches of sand base for the tank:


We then had to have four yards of sand delivered to the house:


and then lay down a level base of sand in a 15-foot diameter:


With that done, the installers showed up and installed the tank:


The green stuff is there to protect the liner from the bolts holding the tank together.


The pipe to the right is the overflow pipe. The line of string running down is the level indicator.

It's a BIG tank: that sucker will hold 5,000 gallons of the wet stuff. It's a liner based system where the water is held by a liner:

 
Looking inside the finished tank. All that black stuff is the liner.

The white piping is for the overflow.

The lighted area is a screen and is where the water comes into the tank.

With the tank in, we could finally get the gutters installed. The gutters are the last item on the punch list with the builder and have been on hold until the tank went in. When the gutters on the house are finished, we'll be closing out (paying the last bit of the retainage) with the builder.

Here's what the gutter man improvised for the rainwater tank.


The vertical bit is vertical gutter but here is only being used to hold up the gutter extension over the tank. It looks good and looks like it will work good. We'll run a rain chain from the downspout to the tank.

Close up of the level gage. It's sitting on the ground cause that there tank is empty.

Back view of the tank. I turned the overflow pipe to be up against the tank and allow more of a path between the tank and the horno. Prolly need to paint that PVC silver...

Farther around the back is a ladder (cute!) which gains human access to the inside of the tank if needed (which is how I snapped photos of the interior). Hard to see, but to the right of the tank at the bottom is the outlet with a ball valve. That's where the water comes out when needed.


And there she is in all her glory! May the rains come soon!

I'll be giving a keynote at an upcoming American Rainwater Catchment Systems Association annual meeting in Austin and touch on our system in case you are in town and want to know more about the system or rainwater in general.

10.06.2013

spouting off (and other nuisances...)

It's been awhile since I've written about the house. I found myself running a state agency for six weeks during a rather interesting transitional period, and it was all consuming time wise. But now I'm back from the land of 12-hour days!

There's still a few straggling items out there to get done on the house (the gutters, which have to wait until the rainwater tank goes in [which goes in tomorrow!]; solar)...

spouting off

If you recall, when I went to try out the guest shower I realized that there was no way to turn the shower on (no pull thingy to transfer water from the tub spout to the shower head). To make matters worse, it turns out the wrong valve had been ordered and installed, the replacement of which would have required tearing out the tile. In short, a mess.

Ye olde spout.

We told the builder we were open to getting a different spout rather than forcing the installation of a new valve. This is actually a blessing in disguise (been getting a lot of those lately...) because we weren't completely happy with the installed spout: yes, it was gorgeous, but it was bulky and haphazardly installed (not the fault of the installer but a design deal). The bulkiness, lateral extent, and visual impact makes it look like something that could be used for support, and the haphazard installation design  meant that if someone made the mistake of using it for support, bad things would result.

The replacement spout is perfect! It matches the gestalt of the showerhead and valve controller and fits the theme of the house. Yay!

The new spout.

gated in

We finally got the driveway gate surfaced. The original plan was to clad the gate with Hardie to match the Hardie fence. Would have been sweet! However, the Hardie, while hardy, has little (what's the word?) rigidity. It's floppier than bunny ears. The builder suggested Polygal, double-walled plastic sheets that come in a variety of shades. We said "Sure!" It closes the space in but still has a bit of transparency to it. Carrying the Hardie around the corner and onto the gate would have looked cool, but also would have darkened up the space under the carport a bit. All in all that 'gal looks mighty fine!


art lights

Got the last of the art lights lit!


The art lights, in general, are simply awesome. Highly recommend them. Besides (ahem) lighting up the art (always a nice touch), they can also be used as a mellower, more indirect light in a room (by not turning on the other lights). Kinda wishing we had put more in (and may switch out some cans with the arty eyeballs to do so).

coming...

We've got a few aftermarket carpentry items coming in (shelves, desk, plug-hider, LED hider/horizontaller), the rainwater tank, the gutters (the last punch list item), and the solar coming. Stay tuned!

8.03.2013

punch party! (attack of the HVAC, house numbers, you grasshole, and more!


Still ironing out the wrinkles on the house. Took Thursday off to sit with the builder and an army of trades as they banged on the punch list. Lots done, but still bits to go...

attack of the HVAC

The biggest wrinkle in our ironing has been the HVAC system. The sub came out and fixed the blown damper and also hardwired the ERV into the system such that it doesn't blow when the full system isn't blowing (all it would be doing at that point is wasting electricity). Unclear why they didn't install the Bryant ERV, which better integrates into the thermostat, allowing the user to control how much fresh air is brought into the house.


We're still having major temperature control issues with the various zones, and the sub basically doesn't know how to fix it (although they won't admit it). The on-site guys say that the system does it all itself, so there's nothing to worry about. Yet we continue to have serious problems:


Byant says "The system will never purposefully cool or warm greater than three degrees from the set points." Yet that is what it is doing.

I'm not an HVAC professional, but I figure it might be one of four things (or combos of all):

1. The dampers aren't working properly, particularly the damper to the master suite. There are times when we get a (comparatively) good amount of air into the bedroom, but more often than not we hardly get any air while the system dumps air into the rest of the house.

2. The dampers are working properly, but the "factory settings" don't send enough air into the master suite. The system is "smart" in that it measures back pressure in the main air distribution center and adjusts the dampers to maximize air flow and minimize air noise through the vents. I found dealer documentation for the system online, and it says that this function can be overridden. We're at the point we don't care about vent noise. Get us some damn air!

3. The ductwork "design" is causing problems. Air flows like water: it prefers the path of least resistance. The path to upstairs is short and sweet: 3 to 20 feet in large and relatively straight tubes. The path to downstairs is also short and sweet: 3 to 20 feet in large and relatively straight tubes. The path to the master suite is a nightmare, long and bitter: 20 to 40 feet through small tubes and various right angles. It is the path of most resistance. What might be happening is that at the lowest fan speed for the system, there's too much back pressure such that the other zones open up to dump the air, and then that's where all the air is going.

4. The ductwork to the master suite is somehow pinched or blocked, which would cause the air dumping just described. Since it appears the sub may have "disposed of" pieces of insulation board in the ductwork (that may have been the problem with the blown damper), it's possible a piece of insulation board is also in the ductwork to the master suite.

I'm thinking the issue is prolly a combo of 1, 2, and 3. Since 3 is impossible to address right now (at least not without tearing up half the house), we have to hope the problem can be solved with the dampers. I don't think 4 is the issue because there are two tubes that run to the master, and both seem to have issue with air flow.

The builder is working to get a Bryant technician (not a dealer tech) out to the house to check the system. The sub sent their best guy, and his response was "I've never seen a system like this." Hopefully the Bryant tech can fix it.

we have numbers!

and they look grand! These are the numbers we bought from modernhousenumbers.com who were kind enough to make us a small zero to riff on the up-and-down rhythm of the o's in our address. The first time we put them up (we being the builder and me), we put 'em up upside down. We were so focused on placement and distance from the light that we neglected to notice that the numbers work right side up (6909) as well as upside down (6069). After they were up the first time, I'm, like, "They look good! but something ain't right...". Fortunately, we only had to change two of the numbers. Our sock-of-the-month club deliveries will now arrive safely.


you grasshole

The first time around they forgot to cut the pavers for feather grass holes. We have them now:


power

We now have power to the hot tub as well as the (future) stage:


outdoor speakers

The outdoor speakers are now installed.


handrails

Our neoplastic handrails are installed! Interlocking-cubist-volume hardware with a slab-of-hickory rail. We bought the rail from stairsupplies.net. Reasonable price for some real nice rails.


tidbits

They put a wheel on the gate:


fill metal on the windows:


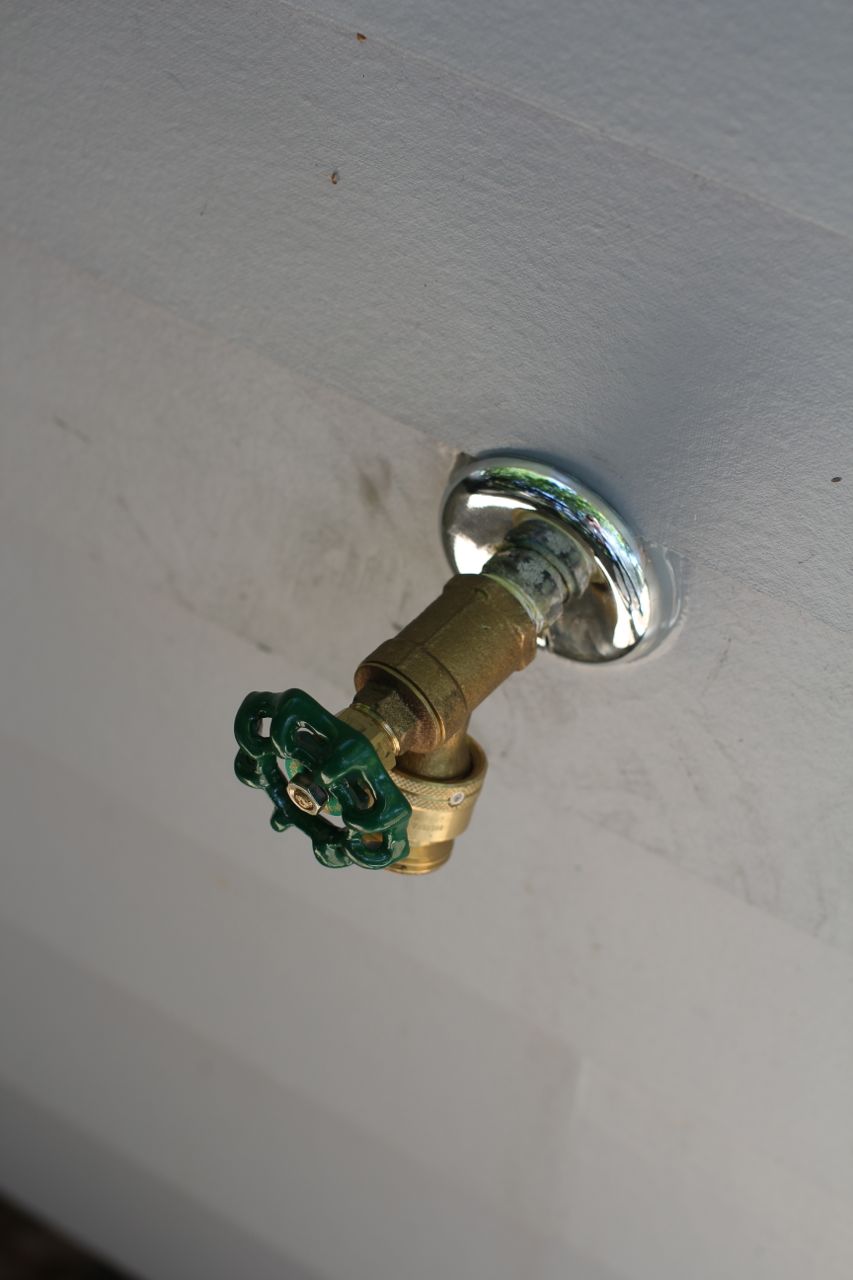
spigot on the garage:


and holes in the wire center cover in the pantry:


some laggards...

Besides the HVAC problems, a few other straggling issues...

The doorbell chime we got doesn't work with the doorbell button. Because the doorbell button rocks it hard, we ordered a chime that we know will work with the button. The only problem is that it never came. UPS says they delivered it, but it didn't show up. We had it sent to the bride's office. However, UPS says no one was home and left it at the front door at 2 pm on a Monday. Someone was at the office (they have a receptionist), so that suggests it was misdelivered. If that isn't frustrating enough, the chime supplier won't return emails about the order.

Fixing to go blog postal on 'em...


On Thursday (punch) morning I told the bride that I was going to shower in the guest bathroom to make sure everything was in working order. She looked at me like I was crazy (as she often does), but I tromped upstairs to get my scrub and suds on. After adjusting the water temp out of the tub spout, I went to engage the diverter to turn on the shower (the thing that forces the water out the showerhead instead of the tub spout). However, there wasn't one (this took a bit of time to conclude because I was sure I was missing something)!

After discussing the lack of a shower diverter with the builder and plumber later in the day and both swearing there wasn't one during the install, the builder checked in with supplier and found out they had sent us the wrong control assembly. In other words, there is no opportunity to install a diverter in the present set-up. That's bad news because replacing the control assembly requires tearing up the wall. Presently looking at tub-spout based alternatives...

This could be a blessing in disguise. The tub spout with this set-up, although gorgeous, is not terribly stable (the sealing has split several times now...) and, because of its heft, begs people to use it for leverage (which breaks the sealing and portends greater problems in the future).


Speaking of sealing issues, we still haven't dealt with the potty problems in the powder room. The toilet cantilevers off the wall, which fits the cantilever motif of the house but isn't exactly the most stable of configurations, especially when former football players stop by for a visit. The installation has left the toilet with a wobble, which breaks the sealing between the toilet and the wall and just feels ominous. After discussions with the plumbing sub and builder, the plan is to cut out the drywall (the source of the wobble) and replace it with Hardie backer and the large format white tile we used in the other bathrooms.


decorating news

Upgraded our IKEA dresser with a higher-end (IKEA) dresser:


Moving on up, baybee! (and moved the old dresser to the guest room.)

Found a cool neoplastic water bowl for the cat (he only drinking moving water...). Filtered and splashed with a UV light. Great for disco parties, too!


Found a new coffee pot. Had a cheap Black and Decker black pot for the apartment. This one fits the house better:


Also found a magazine rack for the "contemplation room". This clever little thing made out of silicon came from Kontextur. Only comes in packs of three, so we have two more to figure out what to do with...


Also from Kontextur are a toilet brush and plunger/roll holder. White and wood goes good (as it should).


coming up

More work on the punch list, more decorating.